Daily site reports are a quick an easy way to keep your customers updated about your employees’ activities at their sites. If your employees are using SYNCrew correctly taking good, relevant photos and writing down good notes about their site visits, you can easily use this feature to share relevant information about the visits with the site’s owner. The feature gives you a lot of options to tailor this report and also allows you to edit the language in case there are grammatical errors or incorrect information.
To start, you need to enter the client’s email address(es) on each location, that way the report can be emailed to the client. You can also enter generic or specific site info that you want to be shown in the report (optional)
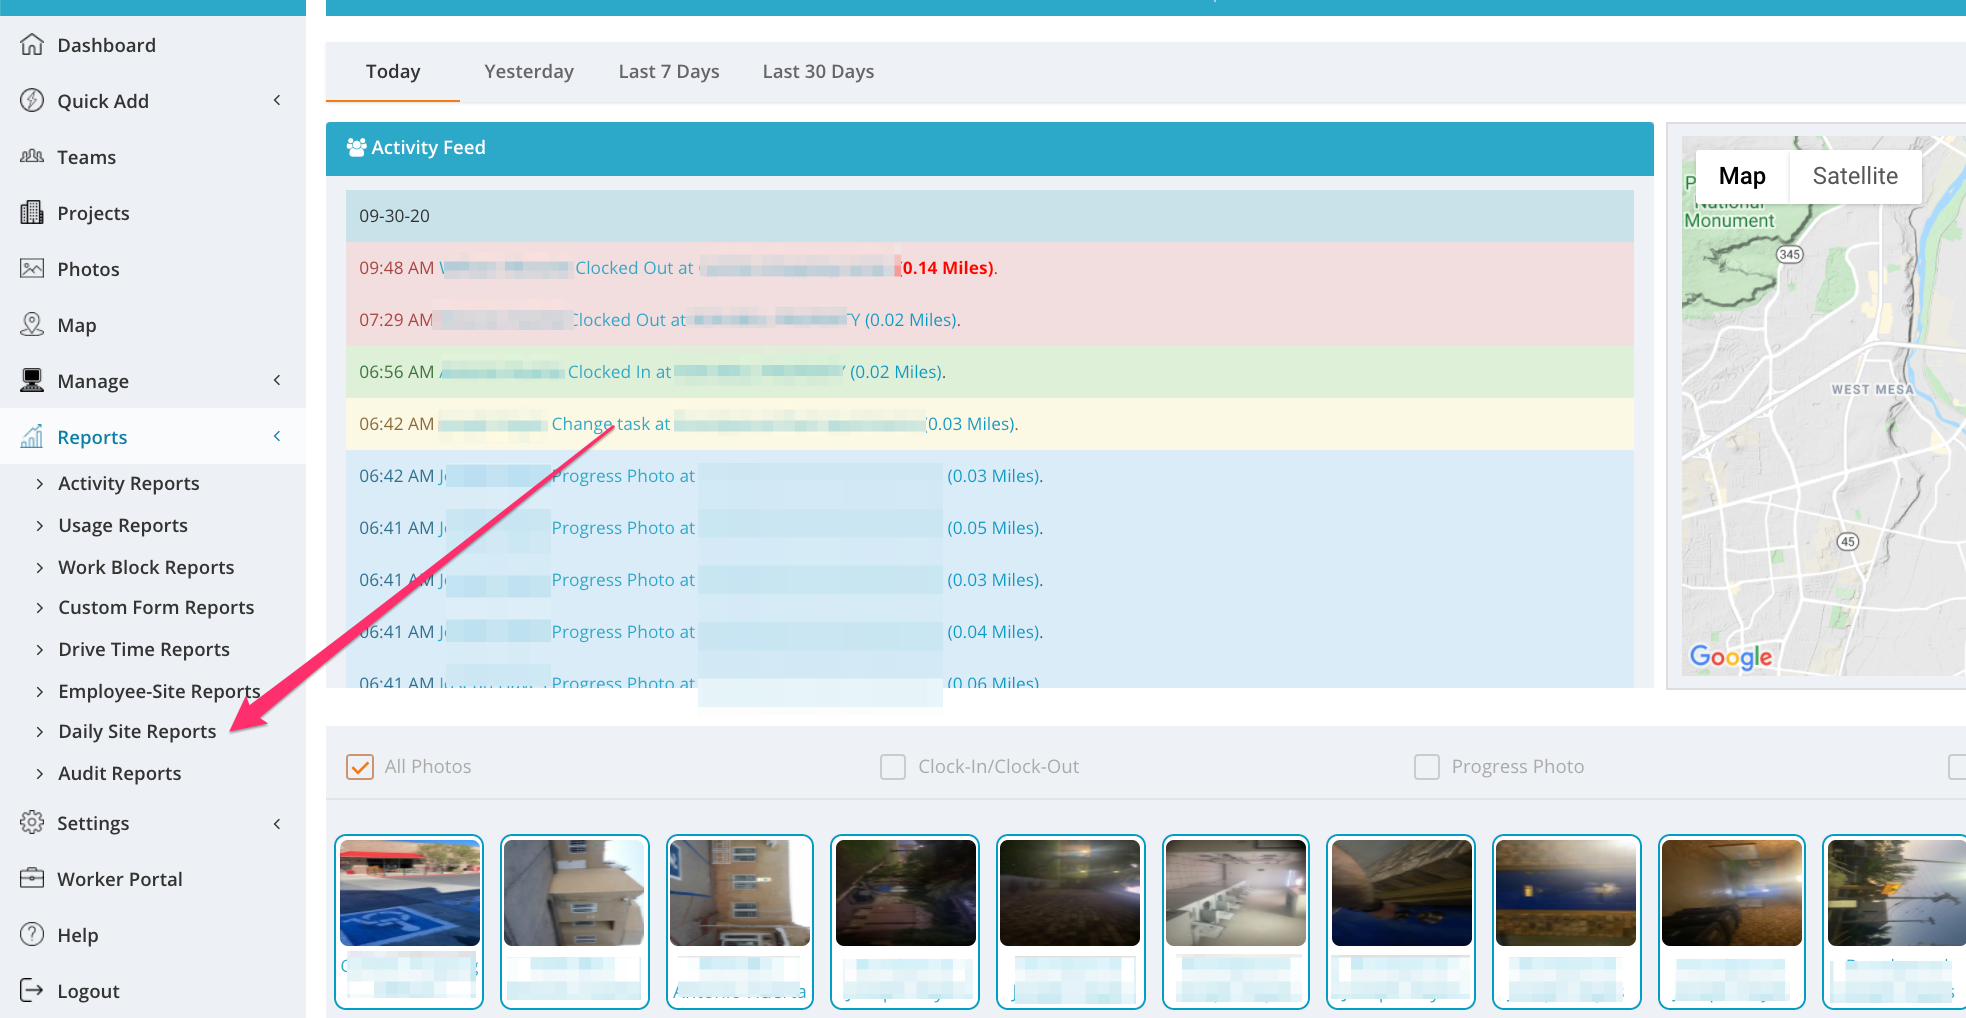
 To run the actual report, select the “Reports” menu item and then the “Daily Site Reports”.
When the Daily Site report page opens, you have several options you can select or set before you run the report. Let’s discuss these options:
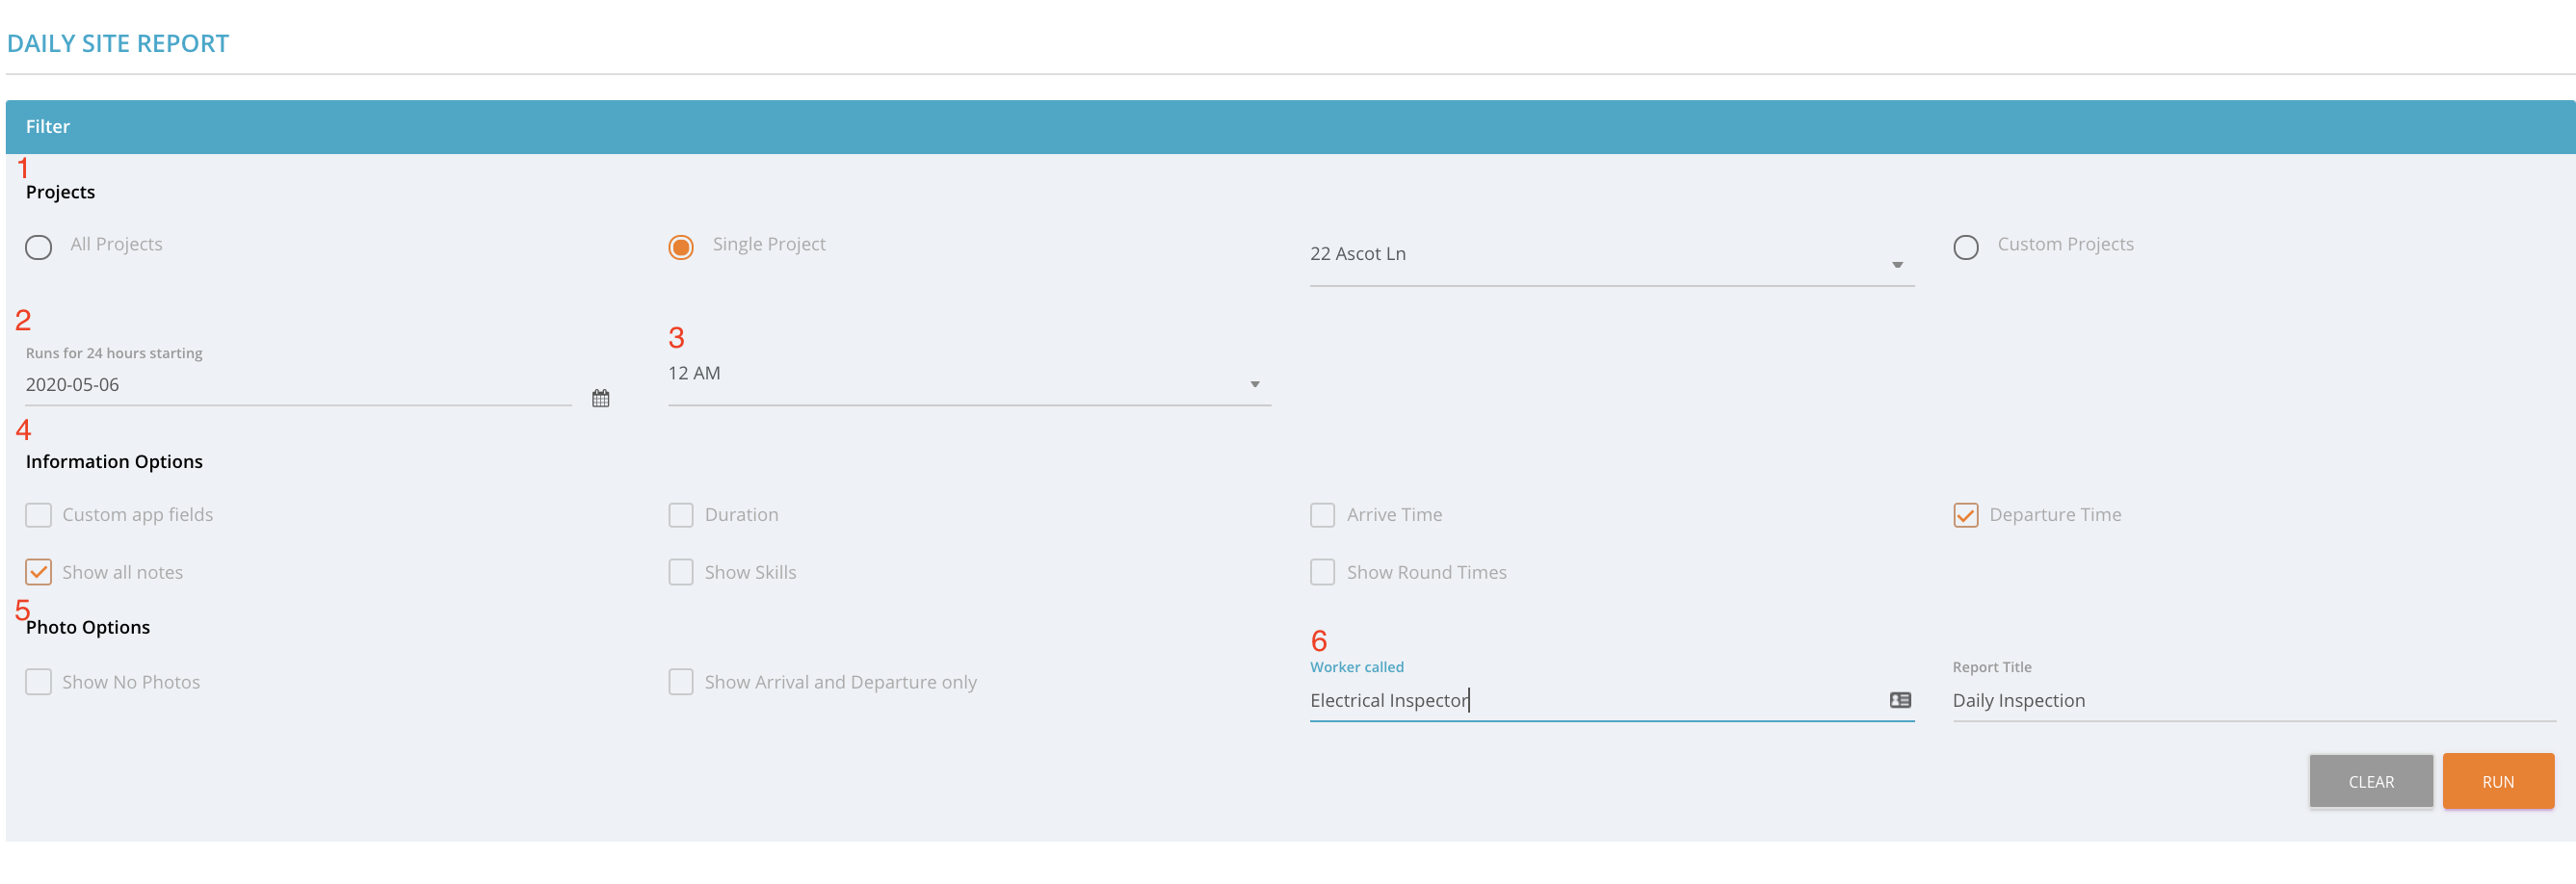
- Select Projects: Here you can select which projects you want to run the report for. There are three options.
- All projects: Runs for every location active in your company
- Single Project: Allows you to select just one project to run this report for
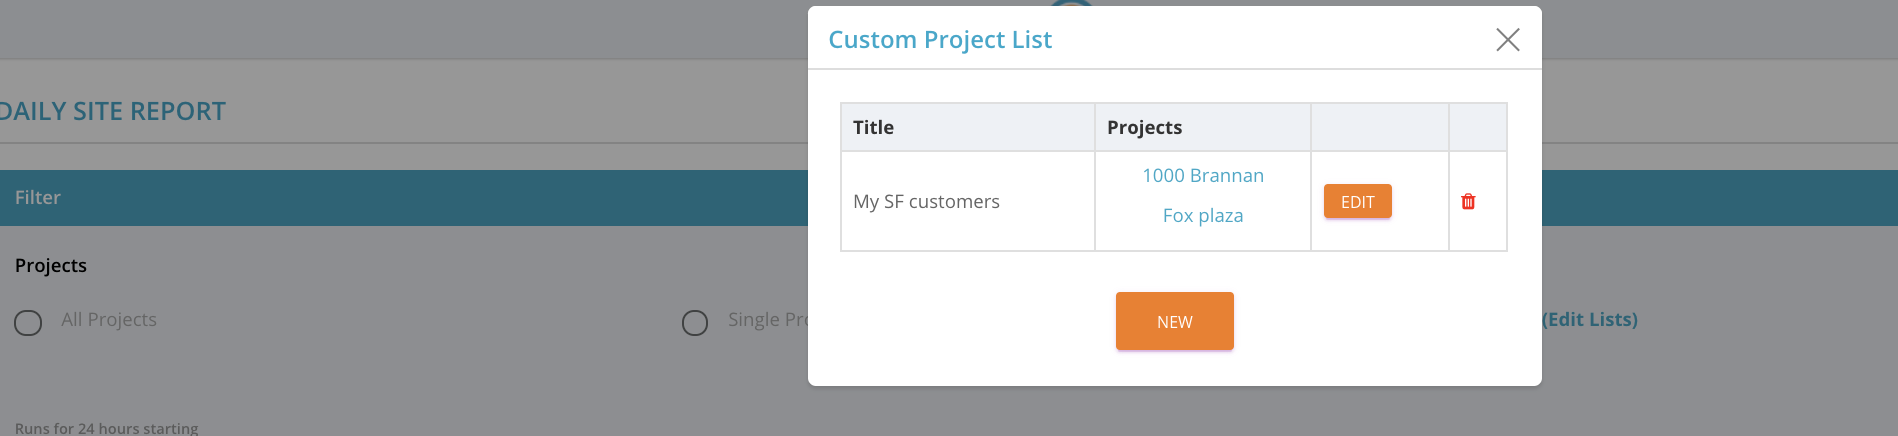
- Custom projects: Allows you to run for a specific list of projects. You can select a previously created list here or create more lists.

- Run for 24 hours starting: The report will show all the site activity for 24 hours starting on the day selected
- This option will allow you to select the start time of the report. For example, if your company is a security company that does night work, you might want to send your customer reports starting at 9pm until 9pm the next day.
- Information Options: These options allow you to add more information to the report such as any custom information captured in the app by the employee, duration of the visit, arrival and departure time, show all the notes the worker took during the visit (adding up the notes for every photo the employee took), show the skill the employee selected (ie. security, inspections, etc)
- The Photo options allow you to remove all the photos form the report, in case you don’t want them, or sho only the departure and arrival photos, in case you don’t want to send the progress photos. In any case the report will limit the number of photos to 6 due to space constraints.
- These options allow you to assign a name to your employees, ie. Security Officer, Guard, Resident Manager, etc and also title the report the way you want the customer to see it.
Once you’ve selected and set all the options you want, you just need to run the report by clicking “Run”. The resulting report will allow you to view and edit the information before you send it to your customer.

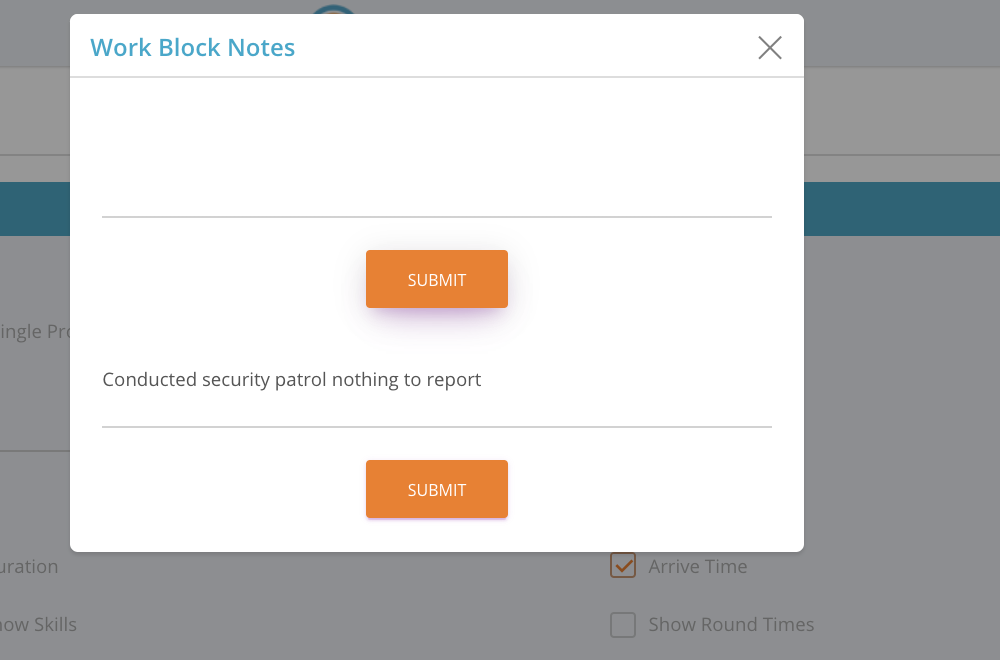
- By clicking on the note, you open a window that allows you to edit each note individually (These were three notes taken on three separate photos)
- By clicking on “Photos” you can review the photos in more detail

- Finally, by clicking edit, you can adjust the time and all other event information in this visit


When you are done reviewing, you can click “Export Reports” to generate a PDF or click “Email Reports” which will generate and send an email with this report (With PDF attached) to each customer email set up in each project. If you run it for two or more locations that have different customers (with different email set up in the project profile) it will send each email+PDF to the appropriate email address.
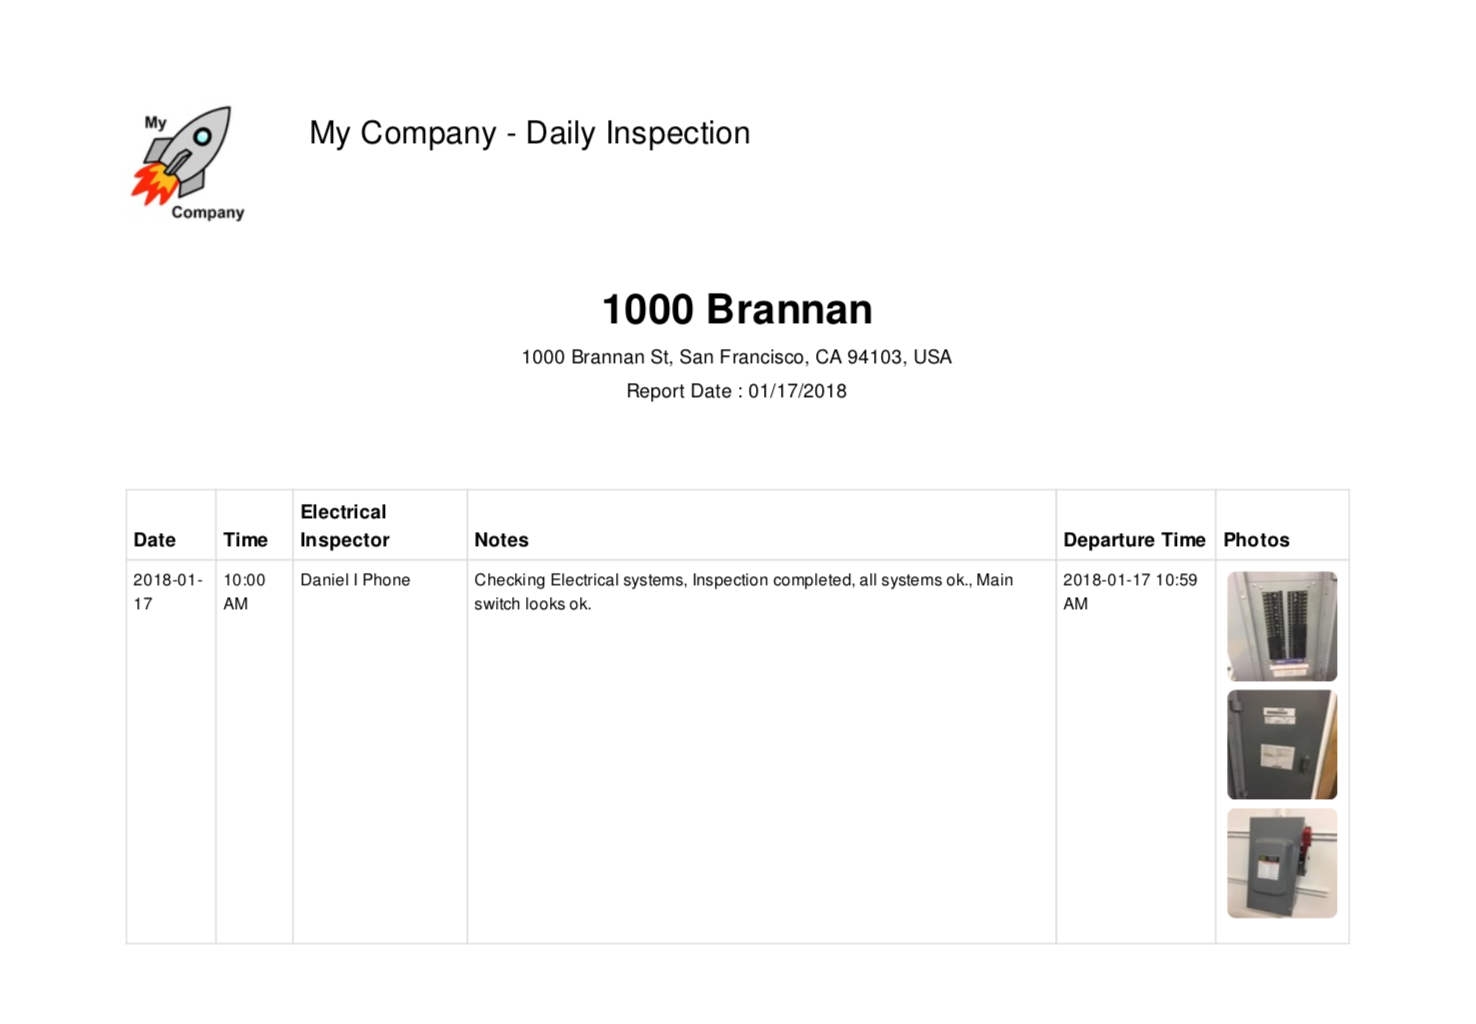
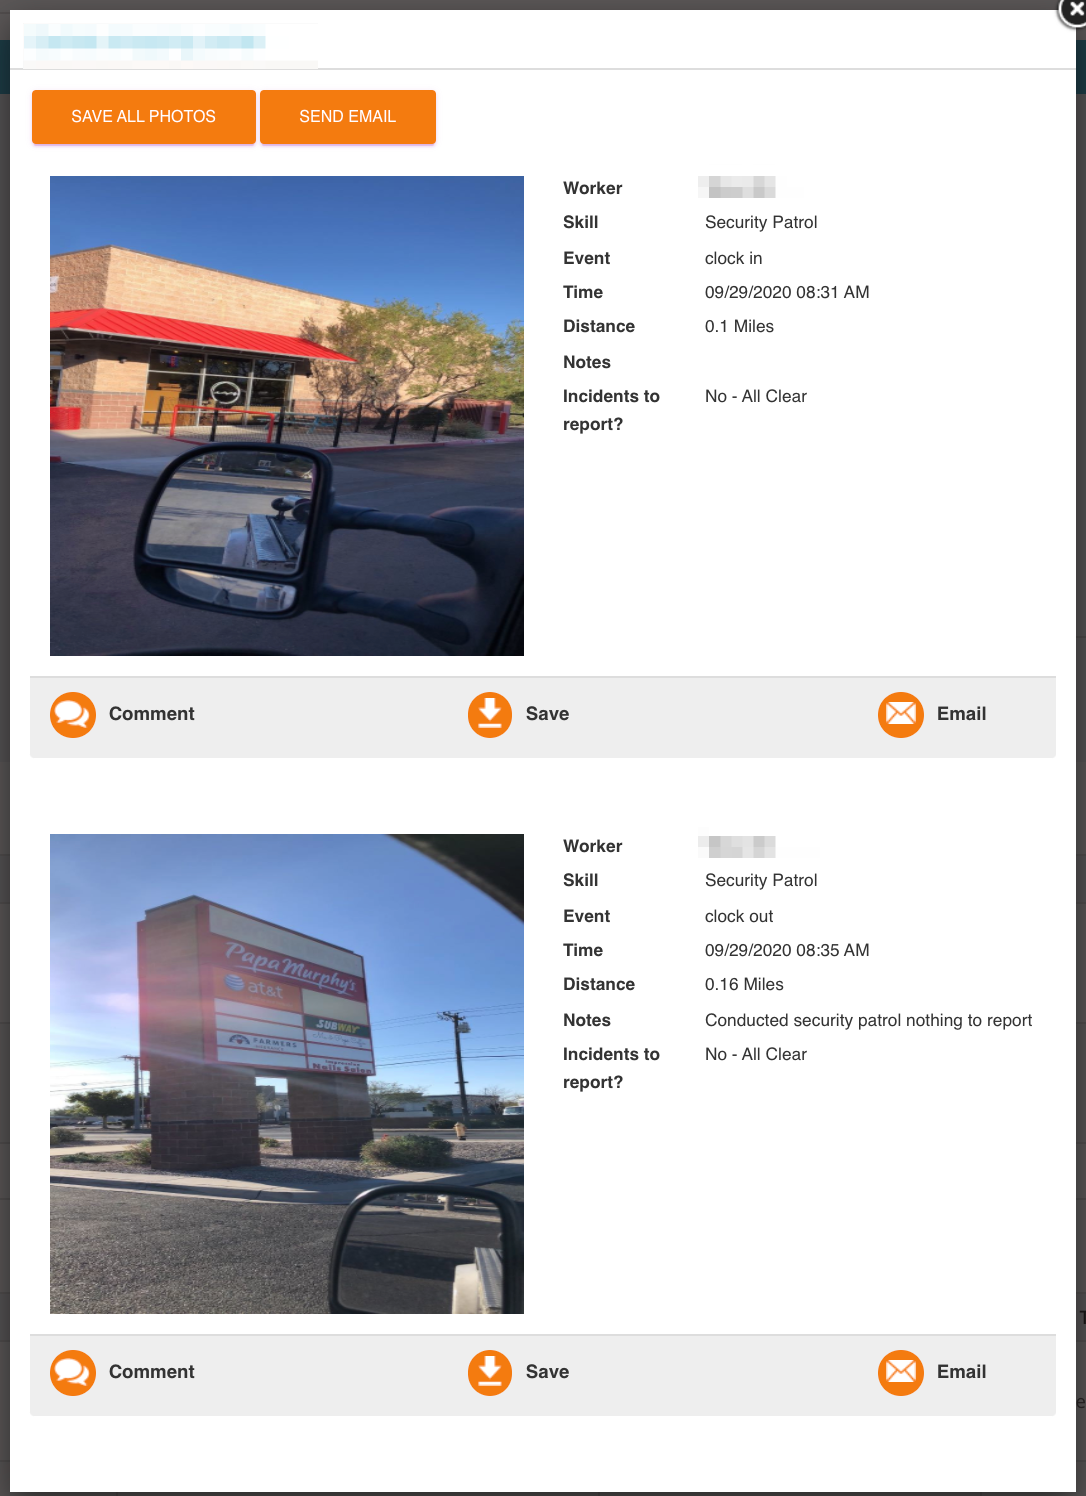
The PDF will have all the optional information you selected, plus your company logo, and will look something like this: